
|
"Unless anyone has a better plan..."
This article requires a properly written walkthrough. |

|
"You're gonna want to see this!"
This article needs pictures. You can help by uploading pictures. |
- "Look here, the gas station is right across the street, we could have been there and back by now. Come on."
- ―Coach
- "Anybody wanna hear a prediction?"
- ―Nick
")
- For the actual in-game milltown, see Ducatel.
The Milltown is the first map of the Hard Rain campaign.
The Survivors and Virgil realize that they do not have enough gas to make it to New Orleans. Virgil drops the Survivors off at a Burger Tank in the town of Ducatel, tasking them to retrieve some gas from the nearby gas station. However, once the Survivors get to the gas station, it has been depleted of all fuel and the only remaining gas is two miles away at another station. The Survivors must walk across yards and through homes, paying close attention to the landmarks while fighting the Infected. They walk past a playground, a garage sale and then eventually find a road that leads to a nearby safe room near the sugar mill.
Strategy
Campaign
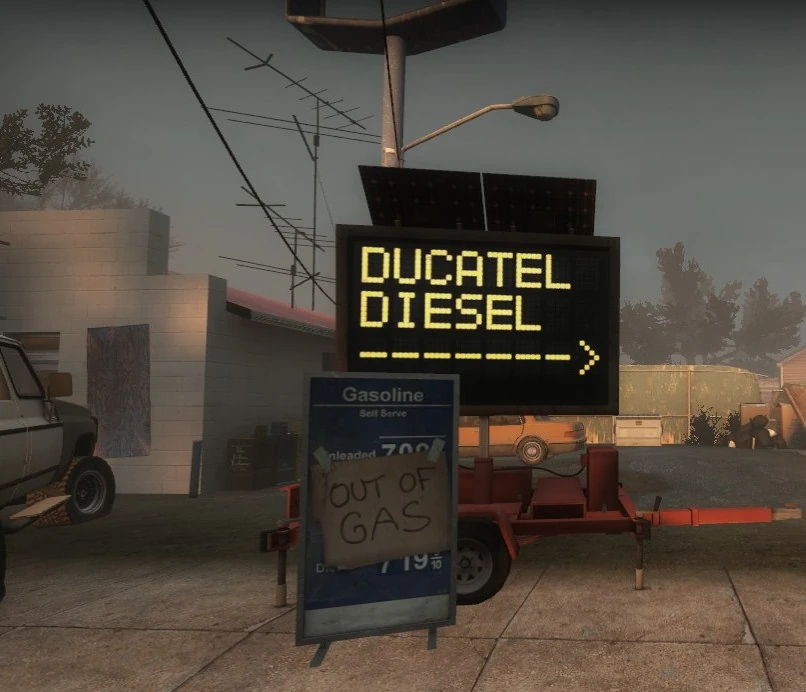
"Out of gas" sign posted over gas prices, backed by a sign telling survivors to head for the Ducatel Diesel station.
The Survivors start the campaign with Virgil dropping them off on a wooden pier by a Burger Tank. Before they enter the restaurant, they encounter a van with a second pistol and melee weapons nearby. When they enter the restaurant, there will be Tier 1 weapons and a Hunting Rifle on the tables, a first aid cabinet (containing two First-aid kits, always take them from the cabinet first as they will respawn at the finale unlike the ones on the counter), grenades, ammo, four more first aid kits on the counter, and a reminder to save some supplies for the return trip. It is recommended to take the molotovs since they are of little use on the finale, the ground being under water from the flash floods. They may also encounter some idle Common Infected. When they exit, they see the gas station, but it is all out of gas and the nearest gas station is 2 miles away. To move on, the Survivors must go over a fence with a fallen plank on it. At times, even at this early in point in the campaign, there can be a red car with an alarm on it so proceed with caution. On the other side is a backyard and some empty houses. Climb a ladder propped up against a trailer to move forward to the next street. Be warned that you might encounter a Tank or Witch at this very early point. (Note that the house nearby is a safe room on the way back and a glitch results in Bots reaching through the wall to snag Tier 2 weapons and first aid kits. Refer to Notes section below.) The Survivors are free to look inside the various houses in hopes of finding grenades, melee weapons, pistols, etc.
Across the street, the Survivors are prompted by one of the characters' dialogue to go through a playground featuring piles of Infected bodies. (Once clear of the playground, an idea at this point is to enter the double story house next to the unit that is merely an empty shell, mount the stairs and exit to the roof overlooking the next street. This makes a great sniping and defensive position. Move over to the roof of the next house along via the trailer to keep off the ground and get more sniping opportunities.) When out of the playground in the next street, a sign tacked up on a house front points in the direction of a garage sale. Be careful because this area is a common spot for a Witch or a Tank to spawn. A treehouse on the left has a Hunting Rifle in plain sight, but climb up and check the small room at the rear for quality supplies like special ammo and laser sights. (A second and higher floor to the tree house makes a great sniping position.) If you want, you can jump from the high floor onto the cover, and jump from there to the house across. If you miss, you'll end up surrounded by Infected and be dealt with damage. There are setbacks on the houses; one, if you are pinned by a Hunter, the Bots will be unable to save you, getting you killed. Also, you might accidentally set off a Tank, and because of the large amount of cars, if he throws one at you will be incapacitated, and your bots will be unable to save you.

The garage sale where weapons and items can be found.
At the garage sale, there will sometimes be Tier 2 Weapons and/or a Magnum and melee weapon, as well as a grenade if you are lucky. Beware that the garage sale is a prime location for a Tank or Witch to spawn if one has not yet done so. Go through the garage sale either by the passing through the house or down the garden next to it and turn right down the third street on the other side. Here is the other place where a Tank or Witch will spawn. After dispatching or avoiding them, proceed down to the end of the street to the safe room, which is on top of the staircase on the side of a building.
In a final twist of horror, the Director might spawn a Tank in front of the safe room. If a Witch spawns, though, there's a chance it will be somewhere near the safe room, or on the roof of the final house before the safe room. This Tank is not too difficult a fight as the player can force it into the street and gun it down, keep in the mind there will likely be a car for the tank to use as a weapon and be wary of special infected as always.
Later on you will have to backtrack through the town, often taking different routes on the high ground to avoid the incoming storm. Because of this checking houses that will likely be flooded or are on the lower level for supplies is a good strategy as it allows you to leave supplies in buildings you'll likely backtrack through to remain for later. This is especially useful given you'll need the supplies in the upcoming safe room to get past the Mill.
Remember, you will be returning through here, ammo piles and laser sights should be noted and kept in mind for later.
Versus
The Survivors
With humans controlling the Special Infected, things can only get harder. However, they can't spawn until you leave the safe room. That doesn't mean that you should let them form up and make a plan though! Hurry up and get your supplies, and get running!
The Infected
See also: The Special Infected
These days the price of gas is way up. Work together as a team, and ensure that the Survivors pay for that gas with their lives.
Overall Tips
- Survivors that have been separated from their teammates are significantly more vulnerable to attack than Survivors that are in groups. Make an effort to attack Survivors that are far from their teammates, as you will be able to deal significant damage before they are saved and you are killed.
- The Survivors all have outlines around them, showing their status and location. Green means they're healthy. Yellow means they're hurt. Red means they're low on health. Purple means they've been covered in Boomer bile. You can probably discern which to seek out first, if possible.
- Think like a Survivor. When you play as one, when are the worst times that something could come at you? Exploit that knowledge.
- Teamwork, as aforementioned. Has a Boomer gotten its bile all over the Survivors? Jump one of them or a clean one. They can't see their teammates' aura until they're clean...and by then it might be too late.
- As much as teamwork is a strength for you and your enemies, a lack of it will be their downfall. If you can focus all of your energy on killing one of the Survivors, the rest will be that much easier to take down. Not only will they have one less gun, but they will have three Survivors to your three incapacitating Infected.
Boomer: There's not a lot of hiding spots, and you'll need to find a good one. However, there's a lot of cars and always one alarmed one. If there's an alarmed car at the start, hide there and hope someone will shoot you, setting the alarm off. Worker Infected are your best ally in the campaign, as they are immune to bile (if no living thing is covered in it) and pipe bombs, and will head for the Survivors, allowing you to bile them at the right moment.
Smoker: This part is not your ally. The rooftops are not good enough to let you hide and ensnare the Survivors, but there are a few good places. You can constrict them at the Burger Tank's collapsed roof for a start, or use the adjacent buildings. Use the rooftops to hide yourself, and don't even think about going down onto the streets; you're an easy target for the Survivors there.
Charger: This part might help you. Charging Survivors can help get a Tank into the area, set off a Car Alarm, etc. It will be hard to find the spot to charge at, because this map is usually void of many crowded spots, and Survivors can easily kill you out in the open space. Charge Survivors in the houses, narrow passageways, or charge them backwards to make the human-controlled Survivors either save him or let him die.
Jockey: The Jockey is a versatile Special Infected, as they tend to control the Survivor. Players who find an idle or Survivor Bot can try to jump on them, and lead them into more dangers, such as more Infected, the Witch, a Tank, in and out of houses, etc. This, combined with the dangers above can quickly kill a Survivor.
Spitter: Players playing as the Spitter will have a hard time dealing damage and surviving than in the other maps. It is best to spit into houses the Survivors are currently in, as it blocks them off a while allowing your allies to respawn or to make a quick plan. Due to your low health and reduced speed after spitting, it is quickly recommended to hide in a spot where most player-controlled Survivors do not look or search at, such as the trailers, behind a house with almost no Common Infected, etc., as there are many spots in which the players do not look.
Hunter: Pouncing from the rooftops might seem like a good idea. There's a lack of excellent Hunter spots though there's a decent amount of cars to hide in. As players usually don't tend to look in some houses, rooms can be good ambush spots, where you can quickly do damage. Always be careful and plan your attack well; the Hunter can be quickly headshot without trying and Hunters tend to do well in crowded spaces.
Tank: This is your best part yet. There are many cars in this map, which will instantly incapacitate Survivors if crushed by them. Chase Survivors into houses for an easier time punching them. Luck will allow you to incapacitate them; if you spawn near the last safe room when it's raining, you'll be at a disadvantage, but if you spawn at the middle, you'll have more luck as there are some more cars on the way. If you spawn at the end right after the last street, you'll have many cars to punch at the Survivors.
Survival Mode
See also: Survival Mode
The Survivors make their return to town to use the Burger Tank sign, but as they wait for Virgil, it seems that Virgil isn't hungry for burgers tonight. With the rain falling, the Infected are swarming wave after wave. Can the Survivors fight off the Infected and swim for shore? Or will they end up being the last people who got gas & regretted it?
Overall Tips
- Teamwork is essential to long-term survival.
- In this mode, most of the popular choke points, closets and easily defensible corners are removed. Even if you find one that has not been removed, it is not recommended that you fight from there as The Tank will quickly defeat you when he arrives.
- You have an infinite amount of time to prepare. Use this to your advantage. Take as much time as you need to set up gas cans, propane tanks, oxygen tanks, and to find a good place to fight from.
- When searching for a place to fight from, remember that you need a location that not only limits where the horde attacks from, but also gives you a fair chance against the Tank. You either need to be able to fall back and deal with the Tank easily, or have a good enough vantage point to kill him before he can get too close.
- Ammunition is a problem. Unless you are being overrun with Infected or fighting a Tank, try to use your pistols as much as possible. Conserving ammunition should be a priority, as trying to get more during a horde attack can often be fatal. When you do head out for ammunition, remember to take at least one teammate with you.
The Milltown's Burger Tank is the prime source. Take your time, and use the gas cans and propane tanks accordingly. On the top of the Burger Tank is a Sniper Rifle, Grenade Launcher, pipe bombs, Molotovs, bile bombs and ammo upgrades. The ground floor is similar to the campaign's version, though it has more grenades, a tactical shotgun, and some assault rifles. Health kits are also located in the top and bottom. The melee weapons include a fire axe, katana and frying pan.
Strategy for this map is fairly straightforward. There are two possible methods: either all four Survivors stay on the roof of the Burger Tank, or three stay on the roof and one stays in the middle of the restaurant. Survivors on the roof should simply kill any Infected they see, with special focus on Special Infected and the Tank. If there is a Survivor on the ground, they should focus on Special Infected and the Tank; ideally, this player should be very good at dodging the Tank, and should attempt to lead the Tank around the tables to delay it and give the other Survivors a chance to kill it by shooting through the broken skylight in the middle of the roof.
The success of this strategy is heavily dependent on the skill level of the players and the ability of the players to remain on the roof without being knocked or dragged off. Extremely skilled players may achieve times in excess of 20 minutes, while inexperienced players may not even get 5.
Notes
- The Burger Tank has four first-aid kits, plus a medical station that will yield two additional first-aid kits. A game instructor tip warns the Survivors to leave some supplies for the return trip, as they will eventually return to the Burger Tank during the finale. However, even if the Survivors take all the first-aid kits in the safe area, there will still be two health kits in the first-aid station when you return to this chapter.
- A player can jump onto the truck near the Burger Tank, giving them a vantage spot for sniping. However this is dangerous as Commons can climb onto the truck, a Tank can throw a rock or other things on the car, Jockeys can ride players off and a Smoker can pull them off.
- If an alarmed car is set off near the playground and the player moves near the wood barricade at the end of the street and hugs the wall, the Commons will begin attacking the bots and will rarely attack you. This may be a problem in navigation because the Next Bots cannot get there.
- A playground can be found in this level, but it is only littered with the corpses of Common Infected, leaving it up to question on what happened to the children of the town. However, according to the graffiti outside the gas station safe room on Mill Escape, most of the town has already been evacuated with their kids and dogs and are heading to New Orleans. This explains why there are no children or dog infected despite there being a playground in the campaign.
- However, it may be due to prevent the game from being accused of child/animal abuse.
- There is also a small treehouse next to the garage sale that carries a Hunting Rifle on its lower platform and good quality supplies in a small house to the rear. The treehouse has two levels, both of which are excellent for sniping and defense. The existence of a treehouse further suggests that there were families with small children living in the area before The Infection.
- At the beginning of the level, there will be a house with two blocked doors. It later serves as a safe room on your way back, after the barricades have fallen off. There are weapons inside and Bots will sometimes reach through the wall and grab the tier 2 weapons.
- Players may also reach through and grab a weapon, though they can't do it by themselves. First they must go idle and then, if they're lucky, their Bot will grab a new weapon for them and possibly even pills, adrenaline, or even a health kit. The only Bot that will never grab another weapon from the ghost wall is Ellis, because he grabs a Hunting Rifle from the Burger Tank (unless a Sniper Rifle spawns in there). However, due to the fact the Hunting Rifle and the Sniper Rifle are tier 2 weapons, Ellis will not grab the Sniper Rifle inside the safe house, unless his Hunting Rifle is running low on or out of ammo. Note that if a player goes idle into a Bot, they'll only collect pistols and the health items, but not the weapons.
- Since The Last Stand update, bots (both actual ones and players who have gone idle) are unable to pick up weapons through the wall.
- The Survivors sometimes have a conversation at the beginning of the chapter regarding a 'gun bag' that Nick forgot to bring with him for the team. This is one of the only campaigns where it is explicitly stated why the Survivors do not have Tier 2 weapons from the last campaign. It is implied in other campaigns that the Survivors either lost their equipment or ran out of ammo in-between chapters.
- You can trap an AI Tank underneath the porch just before the playground.
- A door in one of the houses isn't properly coded and is tied to the door next to it. In other words, when one door opens, the other opens, as well as closing together.
- This was fixed in the Last Stand Community update on September 24th, 2020.
- In several houses, the windows are sealed with planks of wood. However, some of the wood on the windows are missing, indicating that the Infected might have broken in at those spots.
- There are several rooms with an extra door leading outside. This might have been that they would have an extra escape route if the others were cut off, or something else.
- In one of the houses near the ambulance, (where water can seep in later on), there can be Tier 1 or Tier 2 weapons and a melee weapon. If you search the rooms in the house, and go from the weapons, go straight, and open the door on the left and look down, a pistol is glitched beneath the drawers, under the floor.
- The Burger Tank restaurant featured at the very beginning is used as a base for the map Bank (de_bank) in Counter Strike: Global Offensive.
- There seems to be a glitch where the last house before the safe house will have double supplies on the way back. This can happen on any difficulty.