
|
"Unless anyone has a better plan..."
This article requires a properly written walkthrough. |

|
"You're gonna want to see this!"
This article needs pictures. You can help by uploading pictures. |
- "This isn't very romantic."
- ―Nick
- "This water don't look natural..."
- ―Coach
- For the actual in-game roller coaster, see The Screaming Oak.
The Coaster is the third chapter in the Left 4 Dead 2 campaign, Dark Carnival.
Summary
The Survivors must leave their strangely relaxing safe room, navigate an abnormally long Tunnel of Love and make their way towards Whispering Oaks' signature attraction: an all-wood roller coaster, appropriately named "The Screaming Oak." To Ellis' delight, the Survivors must "run The Screaming Oak" and survive a prototype gauntlet crescendo event to reach a chapter-ending safe house in a fairground queue-booth.
This is a very long chapter and one of the most challenging in the game.
Strategy
Also see: Tactics
All campaign walkthroughs are done on Normal difficulty in single player, and are meant to give tips on what to do and generally point out things that might otherwise be missed.
There are, of course, a few key things to always remember:
- Stop, look, and listen.
- Being observant might alert you to something nasty ahead of time, like a Witch, Special Infected or Tank, and allow you to prepare yourself.
- Teamwork.
- This cannot be stressed enough. Left 4 Dead is supposed to be a cooperative game. Communicate with your teammates, if you're playing with others, or if you're by yourself with the AI, point out things they might otherwise miss. In all cases, watch out for each other and take care of each other. You are not going to survive the zombie apocalypse by yourself.
- Be ready for anything.
- Don't panic.
Compared with the Infected, the coaster doesn't look scary anymore. Or not...
Campaign Walkthrough
When starting from this chapter:
- Nick will grab an Assault Rifle variant.
- Ellis will grab a Sniper Rifle variant.
- Rochelle will grab an Assault Rifle variant.
- Coach will grab a Combat Shotgun variant.
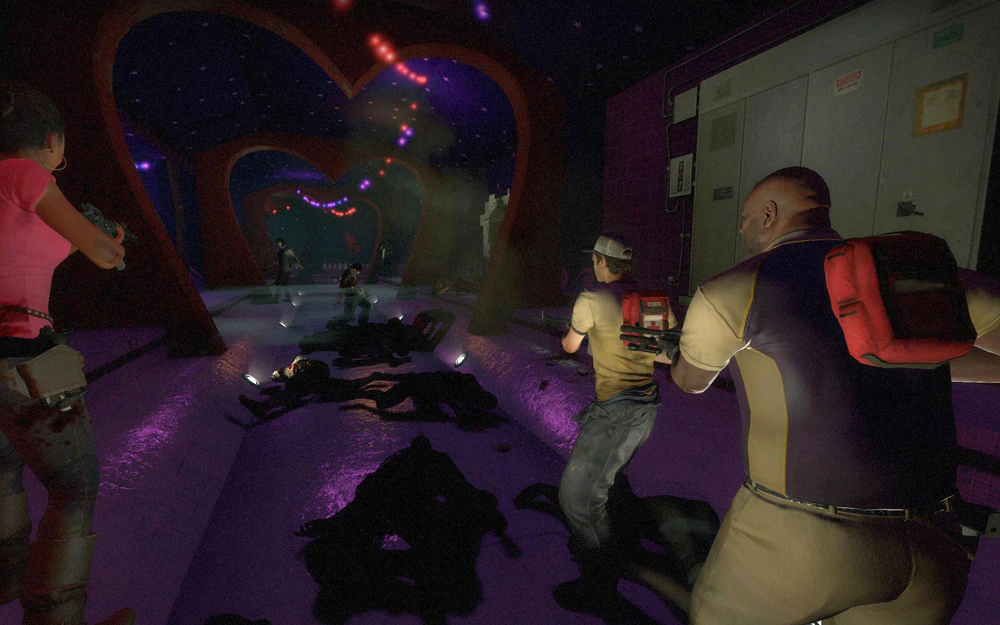
The Survivors in the tunnel of love
They may also keep the weapons they were using from the last chapter. Having survived the sadistic fairgrounds players need to get ready for the next fiendish attractions: The Tunnel of Love and The Screaming Oak. As usual, it is time to select weaponry, heal and grab some ammo.
The safe room door opens onto a short flight of stairs leading up and then down to the start of The Tunnel of Love. This entire feature is packed with Common Infected intermingled with Special Infected (especially Spitters). A Tank or Witch might spawn; care must be taken due to the confined spaces of the Tunnel of Love.
Important: Ammo resupply is sparse in The Tunnel of Love (and even then only granted if The Director is so generously inclined), so Tier 2 weapons should be used when needed (although you will use it very much), so backtrack when you can back to the safe room to restock your ammo. The Director usually spawn only one ammo pile prior to The Screaming Oak, although it's possible for The Director not spawn at all in rare cases.
Players should look around the ticket booth area as at times ammo upgrades or even Laser sights can be found. Clear off the left side of the Tunnel of Love, as this is a hotspot for flanking attacks by Specials and a horde. Hordes can spawn behind the scenery in front of you or on the left side. Go to the right and keep proceeding, watching the scenery as Specials and Commons usually hide there. Keep moving and you'll find a busted set of pipes and two sceneries adjacent from each other. If a Smoker or Boomer has spawned, immediately watch for the pipes — they will always tend to wait there for a victim to catch. Go to your left to find a small room. This room will usually contain health kits (even on higher difficulties). If you go to the right, you will take a small shortcut that takes you into a dark room. The room next to the dark room tends to contain an ammo dump or health kits. The vents are an excellent hiding spot if a Tank spawns in the area; he will usually struggle to path into the vents and will die of frustration soon afterwards. If the Tank maintains visual contact however, simply leave the vent and run in circles to confuse and frustrate him.
The next area of interest is the maintenance room. A Witch will often spawn in its entrance preventing any attempt to sneak past her. A co-op team can either flatten her with a volley, a volunteer can go for a Cr0wn or (if playing solo) she can be startled and left to the AI Bots as the player runs off back down the tunnel. Players can also jump onto the engines and onto the catwalk to avoid the Witch if she spawns there. There is always a random weapon inside a small corner of the room near the stairs to get up.
The Director is either generous or miserly with supplies in the maintenance room. Usual places to look include the table under the stairs for a chainsaw or grenade launcher and under the pipes in the left rear of the room beneath the overhead walkway. Weaponry or ammo may spawn on walkway itself, near the control mechanism after going up the stairs on your right.
Entering the next room, clear off any Infected. There's also a Rescue Closet in there in case anyone has died for any reason. There's usually a pistol or Magnum, a Tier 1 or 2 gun and at times ammo upgrades or health kits. Go up to find a small maintenance room and behind one of them contains a dead person with an ammo dump, Gas can or Propane tank.
Specials will NEVER attack from behind, so throw a Molotov down in case you hear any Specials that are hiding down there. They cannot climb up, but the Commons can climb anything. The Horde, if one spawns, will also come from the hole, making it quite easy to repel. You may also hear a Witch or Tank, so immediately run to the fenced area when you drop down to avoid being mobbed and surrounded easily. With the Last Stand Community update however, Specials can climb on the pipes and break down the wall behind the hole (before the update only The Tank will use this infected exclusive ladder). If the wall is broken down, the survivors may take this route instead as it's safer from being surrounded.

The Clown Infected of Dark Carnival
Immediately after the clean up down below, players should jump down together and engage any remaining Infected to the left and right. If a team is carrying Gnome Chompski, toss him down the hole first so that he does not get left behind should a Special Infected intervene and incapacitate his carrier upstairs. At this point, players may wish to back up quickly to the shorter, closed end of the tunnel to clean up any Infected and to look into a large service alcove on the left next to the gate across the tunnel. Be aware this is usually a prime place for a Witch or Tank, with the Tank causing twice as many problems than the Witch but CANNOT punch the swans at you.
Players keep going through the lower level of the Tunnel of Love until a hole blasted in the wall is reached (one character may say, "Fresh air at last" at this point) leading to a room and the outside. Players need to be on guard as a Charger may storm in from this direction at this point. Check your left to prevent a flank attack and watch your right side, as the open area tends to either have nothing, a Witch which might have to be killed or even worse; a Tank. Once you leave on the right side, fresh weapons are found there, so restock up.
Important: The Screaming Oak gauntlet crescendo event is coming up and it is crucial that players be fully equipped with suitable Tier 2 weapons and reserve ammo. Players should avoid wasting ammo between this room and the start of The Screaming Oak run.
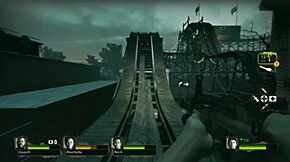
The coaster rush
After leaving the room, players find themselves in a relatively open service area. A lighted building to the left attracts attention and houses a first aid station and supplies (often Laser Sights) in an adjoining room. On leaving the lighted building, a truck to the right should contain weaponry. Players should be careful as a Witch might, but unlikely, spawn inside the truck, making Explosive/Incendiary ammo or a Molotov needed to flush her out.
Immediately obvious to the left is The Screaming Oak roller coaster looming up behind a chain link fence. This is where ammo conservation must be paramount as the area underneath the roller coaster has a fair number of Common Infected loitering around. Access is gained by a section of bent fencing (which forms a "no-return" phase of the chapter). Survivors and bots can jump onto the bent fence at its lowest point.
Before starting the Crescendo, hug the chain fence to try and trigger any Tank fights, as it is possible for one to attack, and players do not certainly want to handle a Tank and a horde at the same time in a sub-optimal area. The Tank will somewhat struggle pathing his way to the team, often attacking with rocks that the fence will easily repel. Once the Tank is killed, be prepared to start the Crescendo. It is possible for Witches to appear, though they generally spawn on the tracks.
The Crescendo Event requires Survivors to navigate the Screaming Oak all the way to the end, which triggers an alarm that causes the Infected to spawn constantly from all angles. The roller coaster itself will flatten anything in its path, including Survivors and Witches in an instant. As the Survivors loop around the track, it is recommended to throw a bile bomb if one has it with them towards the Tunnel of Love and run through the tracks with an adrenaline shot. This should give more than enough time to stop the Crescendo before the Infected return to the Survivors. An ammo dump can be found mid-way through the event and should only be grabbed if absolutely required, despite being on the main path.
Once Survivors reach the tunnel U-loop, it is recommended everyone pushes together as a team, as the Infected will generally spawn in front of the team, severely impeding progress. Double Special Infected are very common at this point, and teams should be wary of double Smokers, who are likely to pull Survivors off the track and force them to go around again. Shut the panel off, deal with the remaining Infected and make your way to the safe room. On the catwalk above the tracks are likely to be several healing items (especially on lower difficulties). There is a very slim chance for a Witch to spawn outside the safe room, and if this occurs, let the bots startle her.
Once inside the safe room and at the end of one the longest and most challenging chapters in the game, a successful player can bask in a sense of accomplishment before steeling oneself up to tackle The Barns.
Weapon Choices
Since much of the action involves masses of Infected at short and medium ranges and in confined spaces, Tier 2 rifles are a good idea.
- Assault rifles: AK-47 > Desert Rifle > M16
- Scoped rifles: Sniper Rifle > Hunting Rifle
- Sidearm: Melee weapon > Magnum > P220 Pistols
- Shotguns (Tier 2): Combat Shotgun > Auto Shotgun
Versus
The Survivors
- When leaving the safe room, be wary of Chargers; a common tactic is for a Charger to charge the ramp leading out of the safe room, scattering everyone and bringing one back into the room.
- If a Tank spawns in the first tunnel, try to stay in the docking area so you have room to move.
- Remember: bullets penetrate the props in the side rooms of the tunnel. Open fire if you think you hear Infected hiding behind them.
- When in the room after the maintenance tunnel with the hole in the ground, throw a Molotov at the wall behind you to repel attackers, then coordinate your descent so all Survivors fall in at about the same time.
- If you fall off the tracks before the steep drop, there's a ladder you can use to climb back up.
- Abuse melee weapons and shotguns to cut your way through the Infected during the Gauntlet Crescendo. However, keep at least two ranged weapons in case a teammate needs help from a distance.
- Be wary of the first left turn you encounter when entering the first tunnel as it is common for Smokers to hide in the Swan at the back.
- Try to run as close to the coaster as possible, as this will cause the coaster to clear your path from Infected. Use adrenaline shots if necessary, but remember not to get too far from your team members!
- Try to backtrack if necessary. This can be useful as it replenishes your gun's ammo and if you face a gun which you don't like or want to use at all, you can have an advantage later on. However, this is useless in single player as there is a glitch where players can swap weapons of the same class (AK-47 swapped for M16 swapped for AK-47) for an instant ammo replenish.
- There is a way to skip the Coaster Crescendo Event. If you are standing next to the alarm, face forward towards the direction you came from. All the way down, there are wooden rails you can carefully jump on in order to climb the coaster. It takes a lot of patience and a lot of tries as you have to plan your next jump carefully. If done right, you will be standing on the Coaster tracks, but you will find the path blocked. Be careful not to start the event if you're on the tracks because the coaster car will run over and instantly kill you or incapacitate you if you're lucky. To avoid almost-certain death, hop on to the railing near the invisible wall and wait for the car to pass you by.
- There is also another shortcut during the coaster: as soon as you start the run, look to your left. You will see a fence, go higher on the ramp and turn around to walk onto it, walk over the small roof in front of you, go back down to the ground, and climb the ladder ahead. Be careful, though: using this tactic puts you in front of the roller coaster, which can run you over and kill you. Stop on the ladder and wait for the coaster to pass, but use extreme caution: the Infected love to attack you when you're on the ladder. This shortcut lets you skip roughly 20% of the coaster.
The Infected
- Tank spawn locations include the first tunnel and the roller coaster, prior to the Gauntlet Crescendo.
- If spawned in the first tunnel, try to keep Survivors in the tunnel as to limit their movement space, but be wary of Molotovs.
In the second tunnel, if you go the wrong way, there's a climbable pipe leading back up to the room with the hole in the ground if you go into the small room. There will be a smashable wall there; use this to surprise stragglers who only expect an attack from the doorway!
- Survivors cannot climb back up the steep drop on the coaster. Try to incapacitate, pounce, constrict, or ride a straggler backwards so their teammates can't come back to save them.
- When the Survivors go into the hole to go in the lower level, try to constrict the last person who goes down the hole; the other Survivors will not be able to help their fellow Survivor by being constricted. Make sure you can't be seen though as you can still be hit by a lucky Molotov or gunfire if you can be easily seen.
- The coaster car can kill any Infected in its path. This includes Tanks, so keep an eye out if you try to ambush Survivors on the tracks.
- It is possible to kill the entire team as a Charger in one charge. Simply wait at the top of the coaster, out of the way of the coaster cart itself. After the Survivors have activated the coaster and the carts go by, get ready to charge them as soon as they reach the top of the very first incline. If done right, you will grab one of them, and send the other flying backwards to be killed or incapacitated.
Behind the Scenes
- Originally, the Coaster was supposed to be a survival level, but it was cut it in the final version because players would be able to stand on the wood that holds the track up and the Infected could not attack you.
- The survival level can be accessed by the use of glitches.[1]
- Originally, the Coaster was supposed to crash causing the alarm to go off, which would have explained the fire in the Zombie Survival Guide, but it was cut.
Notes
- When Ellis crawls through the air duct, he makes a small reference to Valve's Half-Life series, as the main character is often forced to crawl through vents to get to his destination: "One thing video games have taught me, good shit always comes in vents."
- When entering the ending safe room, both doors will be ending safe room doors. When the next chapter loads, however, the one leading to the next level will be the correct one.
- If one is to use noclip to pass the blocked area rather than go through the maintenance room, then a Survivor can run the entire length of the tunnel of love from the safe room to the opening leading to the coaster. Also, in the blocked-off section of the tunnel, there is a boarded-up wall and an orange spray-painted arrow across from a door-sized spot with no texture. This may be evidence that Valve originally intended for it to be a possible route for the Survivors to go through.
- In the safe room at the end of the chapter, Smokers can grab a Survivor through the gap between the walls and the roof of the building.
- The Survival map for this level is different from other maps. Instead of Tier 2 weapons and supplies available at the beginning, Tier 1 weapons are only available. Then players must turn the coaster ride and follow the tracks for more weapons and supplies.
- If you disarm the alarm it may keep on going but will not attract a horde.
- The Survivors, if they use the air vent, will comment it about how it is not "romantic" or call it the "Air Duct of Love".
- Despite the Survivors mentioning that there is water in the track of Tunnel of Love, the water will not put out Special Infected lit by fire. This is probably because the water is not high enough to douse flames properly, and could be another type of liquid as Coach says "This water don't look natural…"
- However, the "liquid" does not slow down the survivors. This possibly indicates it is some sort of non-flammable gas.
- If a player is playing as Nick, while doing the Crescendo, Nick will say "Thank God this doesn't do a loop."
- On the roller coaster, while the players must get to the alarm and shut it off, Nick might say "I hate roller coasters," reminiscent of Francis' comments about things he hates.
- This Crescendo Event can be "ignored", similar to the Merry-Go-Round Crescendo before and the Elevator Crescendo on Hard Rain's Sugar Mill, or Dead Center's Alarm Crescendo.
- Clowns often spawn at the beginning of the tunnel, they also spawn often in the area under the hole in the maintenance room.
- The Survivors will usually name landmarks or objects with the suffix "-of Love" due to the level mainly taking place inside a Tunnel of Love. This was taken further in The Land Stand update, which added many unused lines for this purpose. For example, Nick may say "Deploying Incendiary/Explosive rounds of love!" when deploying Incendiary Ammo or Explosive Ammo.