- "Alright! Gas me up, and we can fly out of here!"
- ―The Pilot
- "This is the last flight outta here, let's go!"
- ―Francis
The Runway Finale is the fifth and final chapter of the fourth campaign, Dead Air.
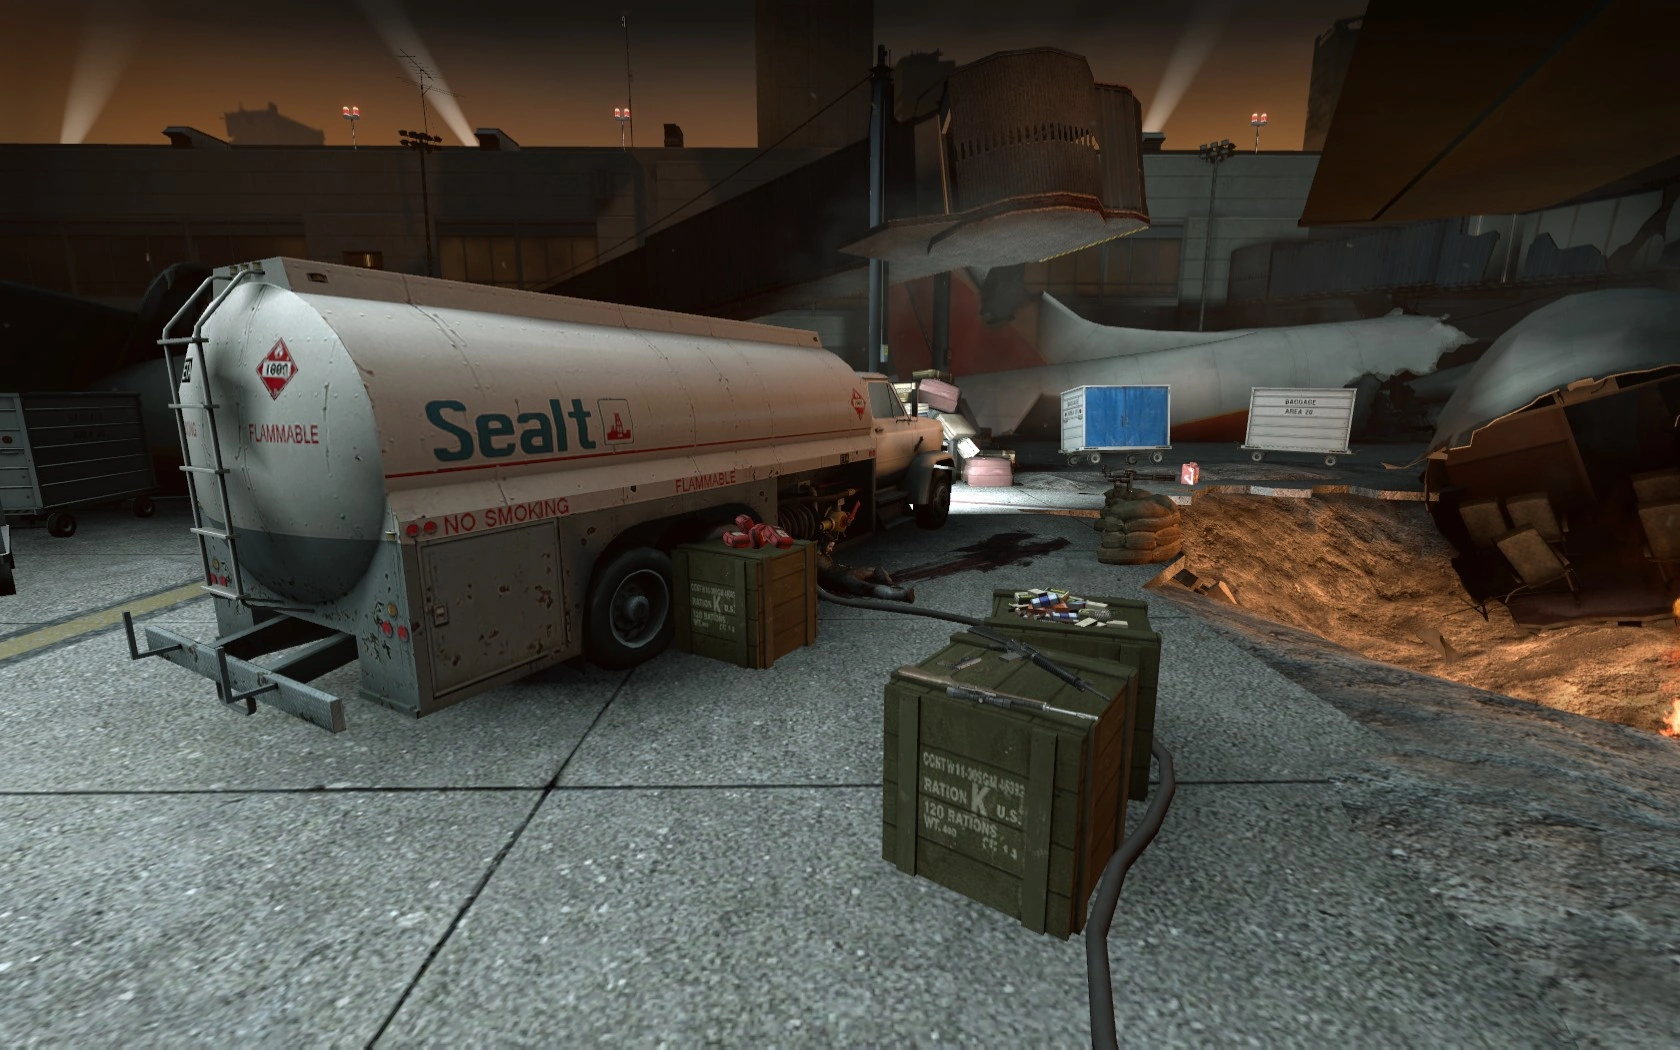
The Survivors exit the safe room in time to see a commercial airliner crash; presumably on account of its occupants and flight crew being Infected. The airport apron is a confused mass of bomb craters, destroyed aircraft and smashed infrastructure. Numerous passive Common Infected are loitering amidst the wreckage.
A lighted pathway through the destruction points the way teams should take after jumping down to ground level to reach a waiting Lockheed C-130 Hercules transport. Further directional guidance is provided by the pilot calling frantically for assistance to refuel his aircraft in return for which favor he offers a ride out to safety. Teams can either proceed directly or they may elect to explore the apron area's many dark spaces and corners for random supplies such as Pills.
A well-lit area containing the C-130, a refueling truck, ammo pile, Minigun, healing items and Tier 2 weapons denotes the setting for the chapter finale. If not already done so, the surrounding area should be searched for explosives like Oxygen Bottles, Propane Tanks or Gas Cans to augment defense arrangements.
A hand-held radio resting in the lap of a dead crewman is used to contact the pilot, who will instruct players to start the fuel pump on the truck to fuel up the aircraft. He warns that this will make "a racket" which will energize the Infected. Once ready, the pump is started and finale begins.
Infected attack in waves from a wide arc of directions. Common Infected are supported by Specials including the usual two-Tank interludes. At various times in the finale, the pilot gives updates on the plane's fuel status. Once the second Tank is killed, the plane becomes fully fueled and the Survivors can board via the rear loading ramp. A closing cut scene then rolls showing the C-130 moving out and taking off, after which the campaign credits appear.
The finale's Infected attack follows the usual Common and Special Infected, first Tank, Common and Special Infected, second Tank, and Bug Out sequence.
Tactics
The Survivors
Once again, you've made it quite far. But with a plane like this, there's no way the pilot will be infected, so there's no way to crash! Right?
Combat is at long, medium and short ranges, so it is recommended that the team's weapons be weighted towards assault rifles with dual pistols and grenades picking up the slack.
Closet Method

Left side of the runway.
There is a small closet in the building to the far left of the Minigun (if you are manning it). If possible, have two people armed with Pipe bombs, and two with Molotovs. When the fuel pump is started, have everyone hide in the closet, with the people in front crouching so the people behind can shoot over them easily. The closet will funnel the Infected and make it easy to mow them down, and make it hard for Special Infected to get to the Survivors. If someone is grabbed by a Smoker, melee them immediately so they do not get pulled away from the closet. Use a pipe bomb if the horde starts to overwhelm the Survivors. When the pilot announces that the plane is half-full, exit the closet and prepare to face a Tank. If you have Molotovs, light the Tank on fire, and then just run from it until it burns to death. Use this time also to restock on ammo, grenades, and health if need be. Once the Tank is dead, get back into the closet and fight off the Common Infected until the pilot announces that the plane is almost full. Exit the closet again for the second Tank fight and burn it to death if possible. Once the Tank is dead, get to the back of the plane and hold off the Infected until the ramp is lowered.
In the Left 4 Dead 2 version of this map, there's an opening in the ceiling of the closet that allows the Infected to attack from above, making this a much less viable strategy.
Boarding Gate Method
There is a boarding gate similar to the one the Survivors enter the level on that has an access ladder. The Survivors can camp this terminal, funneling the Infected. When a Tank arrives, the Survivors need to jump on to the aircraft's wing on their right and follow it down to open ground, where the Tank can be more easily dealt with. Rinse and repeat.
Note: There are a number of walls on the terminal which can be broken by any Infected or the Hunting Rifle.
Runway Method
Another uncommon method is to get all four Survivors to stand out in the open space at the back of the map where the "Do not cross" tape is. There are four points from which hordes will come from: One on the left, behind the tape, two directly ahead around the fueling plane and one to the right of the truck (sometimes filled with gas canisters). The team should camp here until it is time for the Tank to appear and then circle around the fueling plane to avoid the Tank's rock throws, though this method is more effective with a Molotov, it also works well using only weapons to defeat the Tank.
Tanker Method
The gas truck.
An easy method is to climb on top of the tanker and post a player on each end, or have two on the ground and two up on top till the plane fuels. Be wary of Smokers when doing this method. When fighting a Tank, lead the Tank around the tanker if in a team of human players and have the Survivors who are not being chased shoot it. If the Tank changes targets, change the roles of the shooters and runners. If the tanker is too small a place to run around, use the plane as it is very close to the tanker. The plane is also raised slightly from the ground, allowing Survivors to shoot the Tank from under the plane (but not high enough for either Survivors or the Tank to crawl under).
Tail Wing Method
Probably the easiest method is just to use the Minigun by the tanker to eliminate any Infected coming from the front while the Survivor Bots cover you. Watch out for Boomers and Smokers who may climb on top of the tanker behind the Minigun. When the Tank comes, just lay into him with the Minigun until he gets close, at which point just get on top of the truck and pump him full of lead. Repeat until the plane is ready and then run for it.
Rubble Mound Method
Also known as "The Hill Method".
Behind the fueling plane is a large mound of rubble. Have all four Survivors climb this mound until they reach the fence. From here, they can pick off the hordes with ease. It is a good idea to have one Survivor on Smoker lookout. When the Tank comes, just run to the fueling plane and crouch down. The Tank will try to run through the plane allowing the Survivors to take leisurely shots at its ankles until it goes down. If you are quick enough, you should also be able to run to the fueling truck and restock on ammo and supplies. Using this method with the Tank also works with the runway method.
Evacuation Plane Method 1
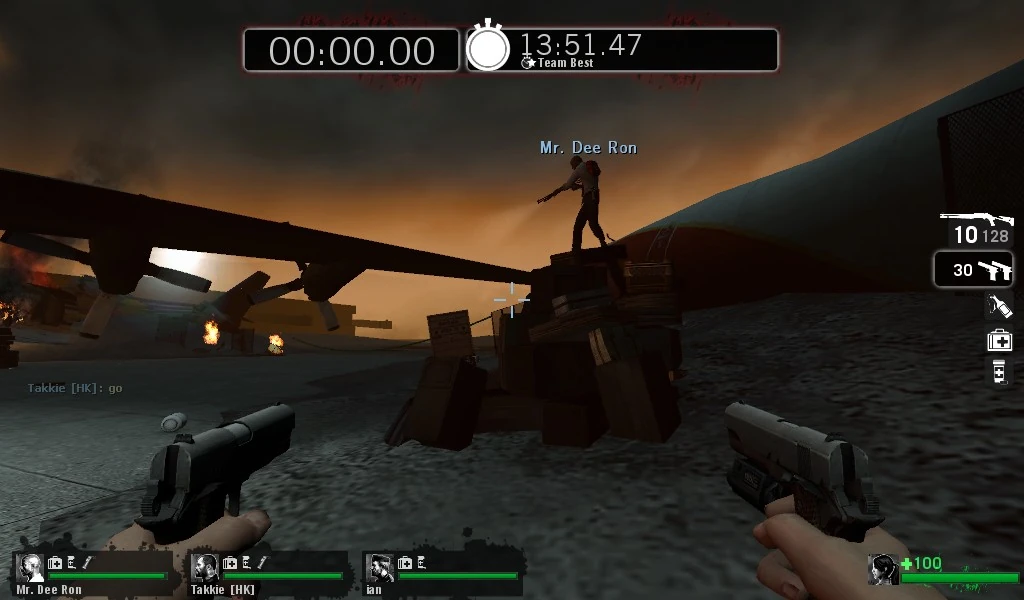
This method requires significant setup. First, find the truck located in front of the evacuation plane. This truck will be your starting jump point. The objective will be to move two of the cargo carts in front of the truck and leapfrog to the nose of the evacuation plane. You may then crouch in the center and be safe from all but Smokers. The cargo carts can be moved by using Propane Tanks, Gas Cans and Oxygen Tanks. You can also move them with the Minigun. Stand behind the cart and throw previously mentioned items into it. If you hold forward, you can often "push" the cart slowly. You have much better control of it this way. Once on the plane, remain crouched and wait for the plane to open up. Once it has, you may drop through its tail and directly into the evacuation scene.
Evacuation Plan Method 2/Undercarriage Glitch (L4D2-Pre TLS update)
This method takes advantage of the fact that attackers cannot pass through or under the evacuation aircraft. Players defend with their backs up against the plane's main undercarriage. Enemies are forced to attack without the benefit of cover across wide open tracts of the airport apron. Defending from this position also helps to reduce the threat posed by Smokers and Boomers since they cannot creep up before being spotted. When the Tanks arrive it is easy to counter-attack with long-range fire and players can move around to distract them and evade their cement-block tosses. If augmented with pre-set explosives, this is a powerful defense position. Health and ammo are only a short sprinting distance away and bots generally co-operate well too. The only proviso is that hordes will attack in waves from 9, 11, 2 and 3 o'clock positions; players must therefore be on their toes and be prepared to cover all angles and shift their fire accordingly. One or two Common Infected will probably squirm under or around the aircraft's nose but they should not pose any real threat.
This method is considered as an exploit in Left 4 Dead 2 and unlike the former game. Since the plane undercarriage is not AI noded in the ported version, infected will typically not spawn if every survivors crouches below the undercarriage and other Special Infected, who did manage to spawn will typically not able to reach to the survivor; save for The Spitter who may spit on the survivor. Tank will usually die shortly after spawning. This trick semi-works when there's bots present; thanks to special infected attack priority on human-controlled survivors. If there's survivor bots around, special infected will generally spawn at reduced rate along with reduced common infected. If the combat last long enough bots will generally position themselves next to the minigun instead of next to the player. Tanks, since they prioritize on human controlled survivor on their spawn, may die before they can see the survivor. If he does manage to see the survivors, Tank may go for the survivor bots first before the human-controlled survivors.
Note the L4D2 undercarriage glitch has been patched since The Last Stand Community update. But remains unpatched on the Xbox.
Left 4 Dead 2 Version
Unlike most Left 4 Dead maps in Left 4 Dead 2, this appears to be a combined version of the Left 4 Dead co-op version of the map, as the Rescue Closet is still present, and the Versus version, as the First Aid Kits are lying on the ground. Generally, there are many more luggage piles around and cargo shipment containers have been placed near the Rescue Closet, where it has been given a roof, allowing more places for Special Infected to spawn. The crashing plane now creates a wall of fire, preventing Survivors from surviving the finale at the runway area the escape plane leaves through — a popular spot on Left 4 Dead due to its ease of defending. An exploit that allowed Survivors to push around punchable Tank objects to make a path up onto the plane, where the AI Infected cannot find them, was completely removed.
The Infected
See also: The Boomer, The Hunter, The Smoker, The Tank
The runway is up in flames, and you've got the Survivors cornered! Now's your chance, leave the plane an empty flight!
Overall Tips
- Any survivors that choose to run ahead of or fall behind their teammates will be much easier to seriously damage and kill. The farther away they are from their teammates, the more likely they are to be incapacitated or die before their teammates can reach them.
- The Survivors all have outlines around them, showing their status and location. Green means they're healthy. Yellow means they're hurt. Red means they're low on health. Purple means they've been covered in Boomer bile. You can probably discern which to seek out first if possible.
- Think like a Survivor. When you play as one, when are the worst times that something could come at you? Exploit that knowledge.
- Teamwork, as aforementioned. Has a Boomer gotten their bile all over the Survivors? Jump one of them or a clean one. They can't see their teammates' aura until they're clean...and by then, it might be too late.
- As much as teamwork is a strength for you and your enemies, a lack of it will be their downfall. If you can focus all of your energy on killing one of the Survivors, the rest will be that much easier to take down. Not only will they have one less gun, but they will have three Survivors to your three incapacitating Infected.
The Boomer
- If the Survivors use the boarding gate method, attack from the side and rain vomit up at them. This is actually advantageous as they generally cannot see you.
- If the Survivors make use of the runway method, you are unfortunately out of luck as open and long distances are not your forte. The best thing to do is to wait and attack when the Tank arrives.
- If the Survivors decide that the tanker method is the best option, you can easily sneak up on them and cover them in bile from multiple directions. Remember that they will most likely scatter for the Tank.
- If the Survivors want to use the tail wing method, you can mount the nearby boarding gate and attack from there. Alternatively, it is sometimes possible to get them from below.
- Finally, if the Survivors attempt to exploit the mud mound method, you are mostly out of luck. As with the runway method, the best thing to do is to wait for the Tank battle and attack then.
The Hunter
- If the Survivors use the boarding gate method, pounce them at unexpected angles. If you can land a successful pounce and some walls have been removed, you may separate some Survivors, causing them grief.
- If the Survivors decide that the runway method is the best option, attack with the sheer distance. The greater the distance, the more damage you can instantly inflict. Mount the plane and other obstacles and pounce from there.
- If the Survivors take advantage of the tanker method, pounce the people on top. You will hopefully cause the others to stumble off and give yourself a chance to do decent damage to your target before his friends can stop you.
- The tail wing method is useful as it can only be reached via one way up. This is a disadvantage for most Infected but an advantage for you. If you pounce and stumble the other Survivors over the edge, they will have to move around and back up the tail wing before they can free your target.
- Finally, if the Survivors adapt to the mud mound method, your only option is to find height and leap from there. A good choice is the plane itself, from which you can pounce the Survivors and do a fair amount of instant damage.
The Smoker
- If the Survivors adopt the boarding gate method, pull them off it. Separate the Survivors and drag someone off the side, whilst keeping out of sight.
- If the Survivors manage to use the runway method, the best you can do is drag someone away from the runway when the others are distracted. You could also try to wait until the Tank appears.
- If the Survivors embrace the tail wing method, you have a very simple yet effective solution. Drag someone down. They'll end up either coming down with you, or clinging on to the edge. The former means they'll take fall damage and will have to move around the plane to get back up. The latter means that they are technically incapacitated.
- If the mud mound method is chosen by the Survivors, pull them away from their precious mound. Do this from around the side of the plane; otherwise, wait until the Tank arrives and attack then.
The Tank
- The other Infected are counting mostly on you to slay the Survivors.
- If the Survivors choose the boarding gate method, try to catch them before they leave and trap them up on the boarding gate. Let their tactic be their downfall.
- If the Survivors exploit the runway method, it is troublesome for you as there is a lot of space for them to move around in. However, most Survivors will run to get more ammunition and supplies after a horde. That is your saving grace. When they go to get supplies, attack with force; otherwise, hit a luggage cart around to try and hit them on the runway.
- If the Survivors use the tanker method, you can fairly easily bash them to death. Luggage carts are also an easy and effective option here, too.
- If the tail wing method is used, try to rush them before they can leave the tail wing. If you hit them from up there, not only will they fly backwards and get separated from their team, but they will also take large amounts of fall damage. As with other methods, if they've left, bash about a luggage cart.
- If the Survivors opt to go with the mud mound method, it is actually rather advantageous for you. Although it outsmarts an AI Tank, a competent human Tank can rush around the side of the plane and bash a luggage cart into the Survivors' faces. They will all be incapacitated.
- When the rescue vehicle arrives though, don't worry about the fire. They will get to the vehicle fast, so don't hold back if your enemies made a blockade of fire; just charge through.
- Survivors like to hang out in front of the plane sometimes at just the right angle for you to punch a cart at them and incapacitate two or three Survivors expecting the open ground to be more defendable.
The Jockey
- This is not a good level for you. There are only open spaces, and clear paths where survivors can easily shoot you. However, it is easy to ride them behind cover to delay the survivors catching up to them.
- The best time to ride in this level is during the Tank. Survivors will be distracted, and often split up to fight the Tank in this open area.
The Charger
- A nice, massive open area. Take the Survivors for a ride!
- If you can, knock down any Survivors that may be lined up, say, on top of the tanker.
Survival
See also: Survival Mode
The Survivors thought they were free. They started the noisy pump, only to realize there was no fuel left. The Infected continue to be drawn to its rumbling. How long can the Survivors hold out?
Overall Tips
- Teamwork is essential to long-term survival.
- In this mode, most of the popular choke points, closets and easily defensible corners are removed. Even if you find one that has not been removed, it is not recommended that you fight from there as The Tank will quickly defeat you when he arrives.
- You have an infinite amount of time to prepare. Use this to your advantage. Take as much time as you need to set up gas cans, propane tanks, oxygen tanks, and to find a good place to fight from.
- When searching for a place to fight from, remember that you need a location that not only limits where the horde attacks from, but also gives you a fair chance against the Tank. You either need to be able to fall back and deal with the Tank easily, or have a good enough vantage point to kill him before he can get too close.
- Ammunition is a problem. Unless you are being overrun with Infected or fighting a Tank, try to use your pistols as much as possible. Conserving ammunition should be a priority, as trying to get more during a horde attack can often be fatal. When you do head out for ammunition, remember to take at least one teammate with you.
- There is a boarding gate similar to the one the Survivors enter the level on that has an access ladder. The Survivors can camp this terminal, funneling the Infected. When a Tank arrives, the Survivors need to jump on to the aircraft's wing on their right and follow it down to open ground, where the Tank can be more easily dealt with. Or, more foolishly, they can stand strong and hope to overwhelm the Tank before it can reach the Survivors. Rinse and repeat until you are finally overrun.
- Note: There are a number of walls on the terminal, which can be broken by any Infected or the hunting rifle.
Runway Method
- Another method is to get all four Survivors to stand out in the open space at the back of the map where the "Do not cross" tape is. There are four points from which hordes will come from: One on the left behind the tape, two directly ahead around the fueling plane and one to the right of the truck which is sometimes filled with gas canisters. The team should camp here until it is time for the Tank to appear and then circle around the fueling plane to avoid the Tank's rock throws; though this method is more effective with a Molotov, it also works well using only weapons to defeat the Tank.
- Note: While playing single-player, rarely, moving to the mound of rubble to the right may cause Infected to entirely stop spawning (excluding Smokers) — it appears parts of this mound aren't navigated at all as even bots can lose position of player, practically resulting in free time.
Tail Wing Method
- There is half of a crashed plane adjacent to the boarding gate used in the Survivors' strategy. Have all four Survivors climb up the tail and stand on the end of the plane next to the tunnel. One person should have a sniper rifle to deal with Special Infected as Smokers can still get to you, and Boomers can vomit on you from the boarding gate. However, the horde can only come up the tail of the plane, making them easy to deal with. When the Tank arrives, the team should move down and fight it on open ground, then return to the tail wing.
Rubble Mound Method
Also known as "The Hill Method".
- Behind the fueling plane is a large mound of rubble. Have all four Survivors climb this mound until they reach the fence. From here, they can pick off the hordes with ease. It is a good idea to have one Survivor on Smoker lookout. When the Tank comes, just run to the fueling plane and crouch down. The Tank will try to run through the plane allowing the Survivors to take leisurely shots at its ankles until it goes down. However, in survival mode, the Tank will not always fall for this trick, so stay sharp. If you are quick enough, you should also be able to run to the fueling truck and restock on ammo and supplies every now and then.
Luggage Pile Method
The luggage pile method
- Have at least three people armed with hunting rifles. If you have NPC's, kill them. Have all of the Survivors at the top of the luggage pile behind the plane. On the luggage pile, very few Common Infected show up, and the Tank gets stuck behind the plane and dies. You are still vulnerable to Smokers and Hunters.
Behind the Scenes
The early Runway.
An early version of the Runway seen in the materials/console folder shows that the area was virtually pitch-black at one time, which the only lighting being near some parked planes. In fact, there is no 3D skybox period. It seems that the idea of Dead Air taking place in a ruined city was not a part of Dead Air from the beginning. In addition, there is no rubble near or on the runway, which suggests that the idea of the airport being bombed was not developed when the airport chapter was first made.
The image's name is rooftoprun.vtf. The player spends the first two maps of Dead Air running across rooftops, which is where the filename likely comes from.
Notes
- Inside the safe room where the Survivors begin, the player can usually see a box sitting on a table which advertises Valve's video game, Team Fortress 2. This also has an Easter egg as the box says collect all 10, seeing that there are only 9 classes in Team Fortress 2. The tenth is probably a reference to the cut civilian class, that was included in the original Team Fortress, or possibly Saxton Hale.
- The fuel pumper is a diesel tanker, made by the "SEALT" corporation. The name and logo is a combination of Chevron and Shell gasoline.
- In Dead Air, the airline company is called "Vector Airlines". "Vector" is a scientific term for anything that carries an infection/disease. The planes in the game carried the Infection elsewhere in the East Coast, technically making them vectors for the Infection.
- It is rather odd that the plane that crashes is unlike any other plane in the airport: it's blue with white stripes, while every single other plane is white and orange. Perhaps it belonged to another airline.
- One of these white and orange planes can be seen in the Left 4 Dead 2 Campaign, Swamp Fever. Crash-landing, it could have traveled from the airport. There is also a nearby paratrooper, possibly trying to fight off the Infected zombies, but died in the line of duty. Oddly, he is also infected, but hasn't reached the ground, hinting to the airborne Infection theory. However, it is also possible he turned into an infected while parachuting.
- Survivors can take damage if they stand in front of the crashing plane in Versus mode, though special infected players are exempt. The value ranges from 20-25 on average.
- Ironically, the sound of a plane crashing does not draw any Infected, but the sound of a fuel pump starting up will.
- You will be pushed out of the way (without any damage) of any of the wreckage from the plane other than the main body if it hits you.
- If you look over the airport, you can see lights when you turn on the pump. This is what draws the Infected toward you, not the pump's noise. It's notably odd that activating a pump will also turn on searchlights.
- If one forgets to close the door after everyone has exited the safe room and the team has decided to stay near it for a certain amount of time, the Director has a higher chance of spawning Special Infected―most commonly a Smoker and a Boomer―inside the safe room itself.
- One thing to note is that the campaign takes place two weeks after Infection, and yet there are still planes flying over the already clearly marked quarantine zone. This means that there is still air traffic around the area, both military and civilian.
- The C-130 has Republic of Korea Air Force (or, ROKAF) rather than U.S. Air Force markings on it, due to the modelers using the photograph of a ROKAF aircraft as reference material. In-universe, the plane was likely withdrawn from overseas to support domestic missions.
- It could be assumed that when the plane landed, there were still some non-Infected personnel at the airport, as the fuel line is connected to the plane. It seems that the person with the radio lying dead against the fuel tanker was still alive when the plane was at the airport, as the radio is connected to the cockpit and he is next to the already connected fuel pipe, but it looks like the Infected got him before he could turn it on.
- A rare glitch may occur when a Witch is spawned but instantly killed on the plane's boarding ramp and the Survivors won't be able to get on the plane.
- In extreme rare cases. It's possible for plane to get instantly fully fueled without having to hold up the finale. This can happen if the team is performing the "Evacuation Plan Method 2" glitch right after starting the fuel pump.
- The "Do Not Cross" tape cannot be crossed by Survivors and it cannot be destroyed by gunfire. However, flame from Molotov or a Gas Canister can burn the tape leaving the seemingly endless runway open, yet it still won't be possible for Survivors to enter it. In the ported Left 4 Dead 2 version of the campaign, the "Do Not Cross" tape is replaced with a line of fire.
- The fire extinguishes when the plane is about to move to it. However Infected will still get ignited if they run through the place where fire used to be.
- On rare occasions, a Witch may spawn between the safe room and the finale zone. Though this is capable of occurring in any finale maps, it is oftentimes necessary to kill the Witch (since the overall size of the map is pretty small) to avoid startling it, especially in the heat of a Tank fight.
- The Tank spawns can be anticipated by listening to the pilot chatter, allowing you a little more time to prepare. When he says "The fuel is halfway," that is the cue for the first Tank. When he says "The fuel tank is almost full," that is the cue for the second Tank.
- By enabling "Noclip" and leaving the safe room, it is possible to see the model of the plane that crashes. The crash landing does not occur until someone opens the safe room door.
- During the rescue cutscene, the right wing of the C-130 clips through the front of one of the crashed planes.